Use Let's Encrypt to encrypt your WordPress site
Here's a quick tutorial on encrypting your WordPress site using Let's Encrypt (free).


Here’s a quick tutorial on how to encrypt your WordPress site using Let’s Encrypt.
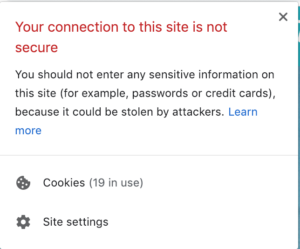
When you install a WordPress site, you most likely are going to start off with a website that isn’t encrypted.
http://
vs
https:///
The latter, https:// is much more secure.
The impact of not having encryption that can be huge if you sell products or services as customers may not want to trust someone’s website that isn’t secure. Furthermore, Google Chrome has started to give pretty severe warnings whenever a site isn’t secure interrupting the experience of users.
Here’s a quick tutorial on how to encrypt your WordPress site.
1. Encrypting your Site
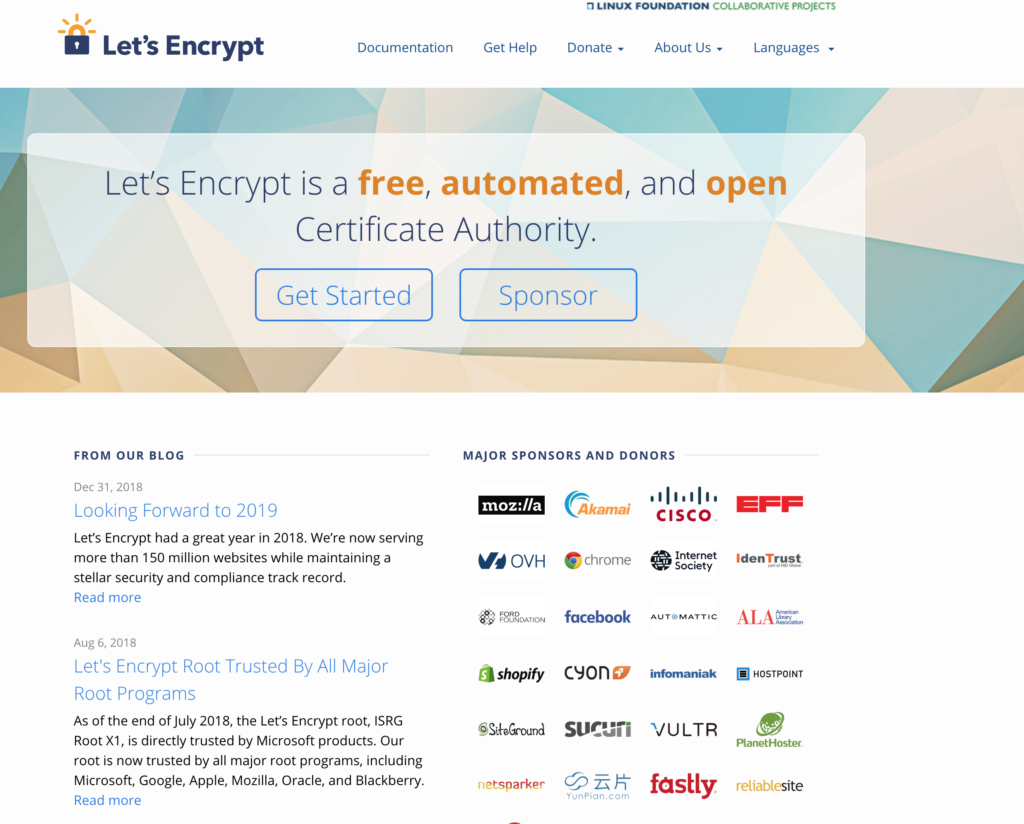
A couple of options are available if you want to encrypt your site. I will discuss Let’s Encrypt since it is a free solution and one of the most widely used.
Option 1 – Your WordPress Hosting offers Let’s Encrypt (Recommended)
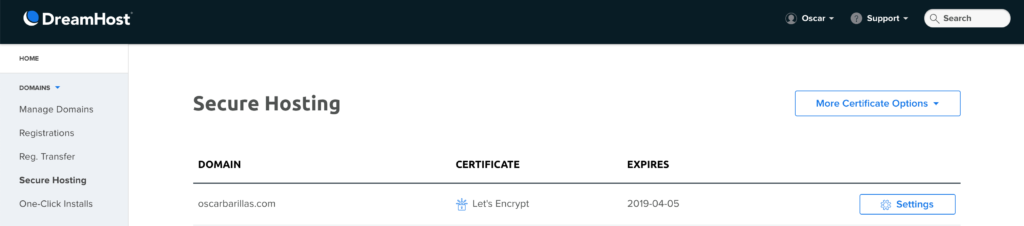
I currently use DreamHost as my provider for my WordPress hosting needs. One of the features they offer is a simple way to integrate SSL encryption into your website installations.
Login to your host to explore if your WordPress hosting provider offers Free Let’s Encrypt SSL certificates.
This is the recommended pathway as it is relatively easy and simple to do.
Option 2 – WP Encrypt Plugin by Felix Arntz https://wordpress.org/plugins/wp-encrypt/
WP Encrypt is a plugin that adds SSL certificates to your WordPress site. Unfortunately, it’s no longer maintained and the directions aren’t straightforward.
2. Force your site to be HTTPS
1. Change the settings of your website to be https://
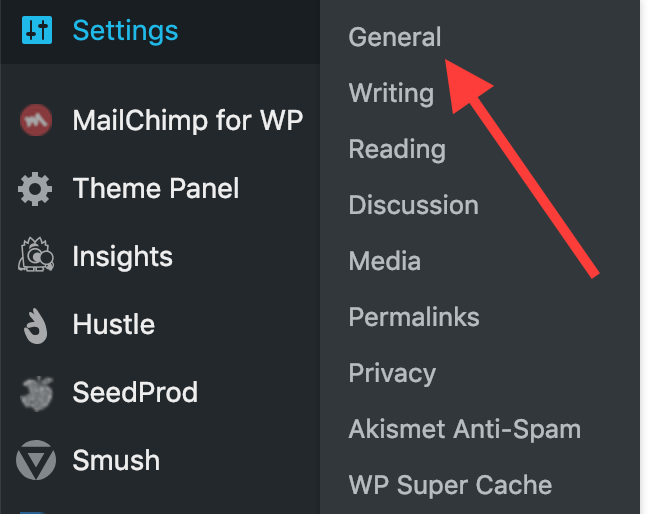
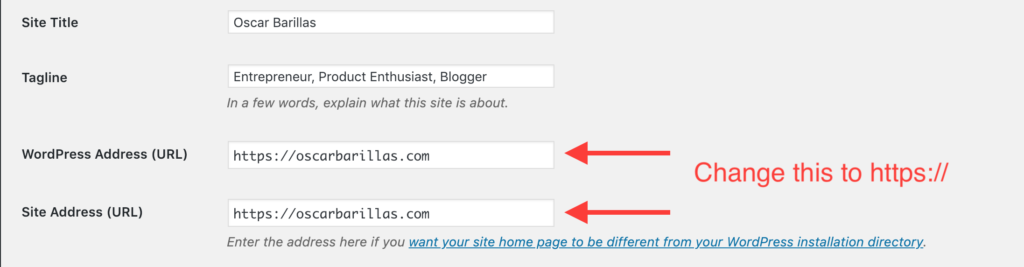
On the General Settings page, it is recommended that you modify the WordPress Address and Site Address to now have an https:// at the prefix.
2. Modify .htaccess file
The final step is to modify your .htaccess file to force anyone who accesses your site via http:// to be redirected to https://. The .htaccess file allows you to control user and server behavior in regards to the urls on your site.
Add the following lines to your .htaccess file:
RewriteEngine On
RewriteCond %{HTTPS} !=on
RewriteRule ^(.*)$ https://%{HTTP_HOST}%{REQUEST_URI} [L,R=301]
Your .htaccess file should look like this when you are done.
RewriteEngine On
RewriteCond %{HTTPS} !=on
RewriteRule ^(.*)$ https://%{HTTP_HOST}%{REQUEST_URI} [L,R=301]

# BEGIN WordPress
<IfModule mod_rewrite.c>
RewriteEngine On
RewriteBase /
RewriteRule ^index\.php$ - [L]
RewriteCond %{REQUEST_FILENAME} !-f
RewriteCond %{REQUEST_FILENAME} !-d
RewriteRule . /index.php [L]
</IfModule>
# END WordPress
3. Clean Up
1. Rename files and posts to be https://
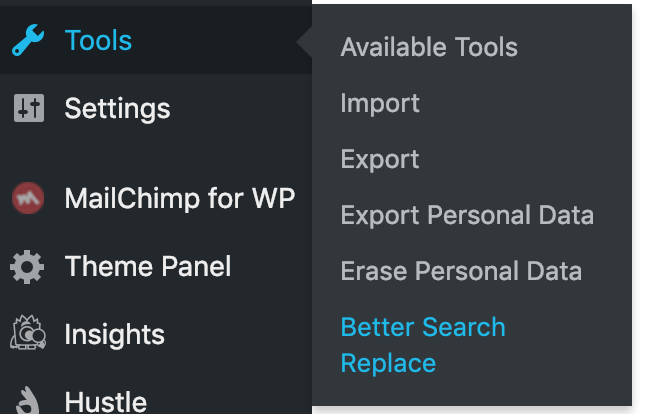
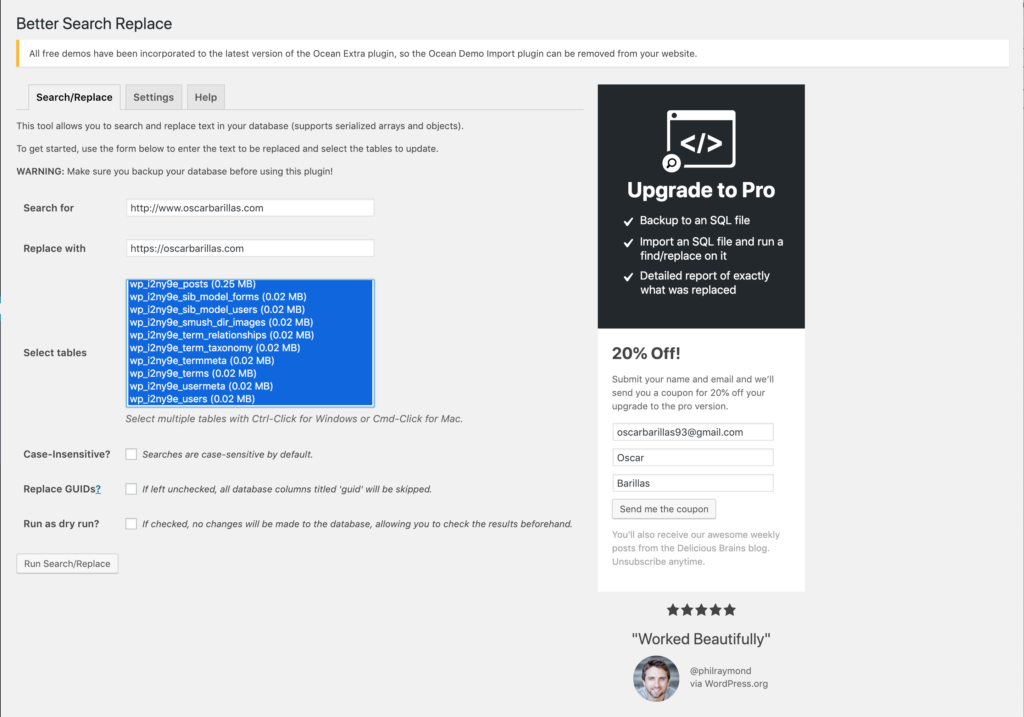
You most likely will have some errors on posts and images that still have an http:// prefix. To fix these errors at scale, install the Better Search Replace plugin. This plugin will allow you to search and replace all the instances of http:// to https://.
Once you activate the plugin, it will be under the Tools section of WordPress.
You then want to write a query that will search for instances of your http:// site and replace them with https://. See the screenshot below.
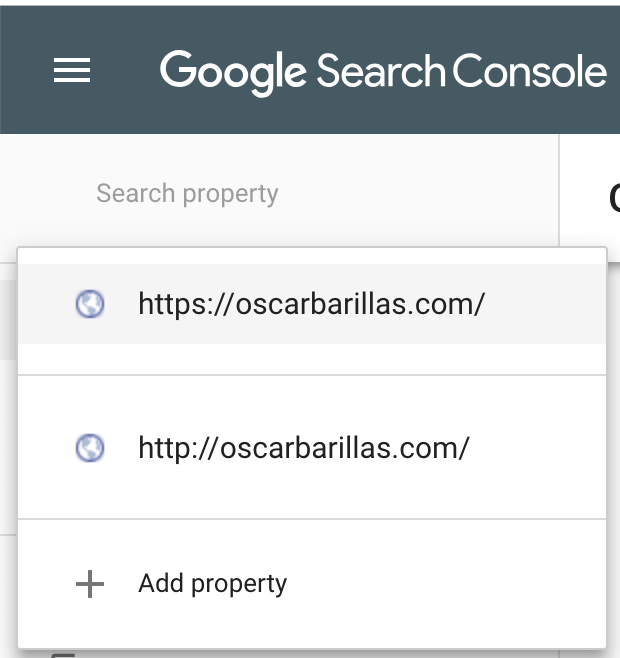
2. Add https:// property to Google Webmaster
Lastly, you want to add a new https:// property to Google Webmasters.